Quickstart
This guide will get you all set up and ready to use Akeero. We’ll cover how to get started by signing in and designing your first infrastructure. We'll also look at where to go next to find all the information you need to take full advantage of our tools.
We're currently in private beta. If you do not have an account yet you can join the waitlist at here. We're onboarding people every week so it shouldn't take too long.
Signing In
There are currently two ways to sign into Akeero - using your GitHub or Google account. The process is simple - simply visit app.akeero.com and click either 'Login with GitHub' or 'Login with Google'. You will be asked to provide a Workspace name and then you will be brought to your Workspace dashboard.
Your first project
There are two different ways of creating a project in Akeero. You can begin from a template or a blank project.
Templates
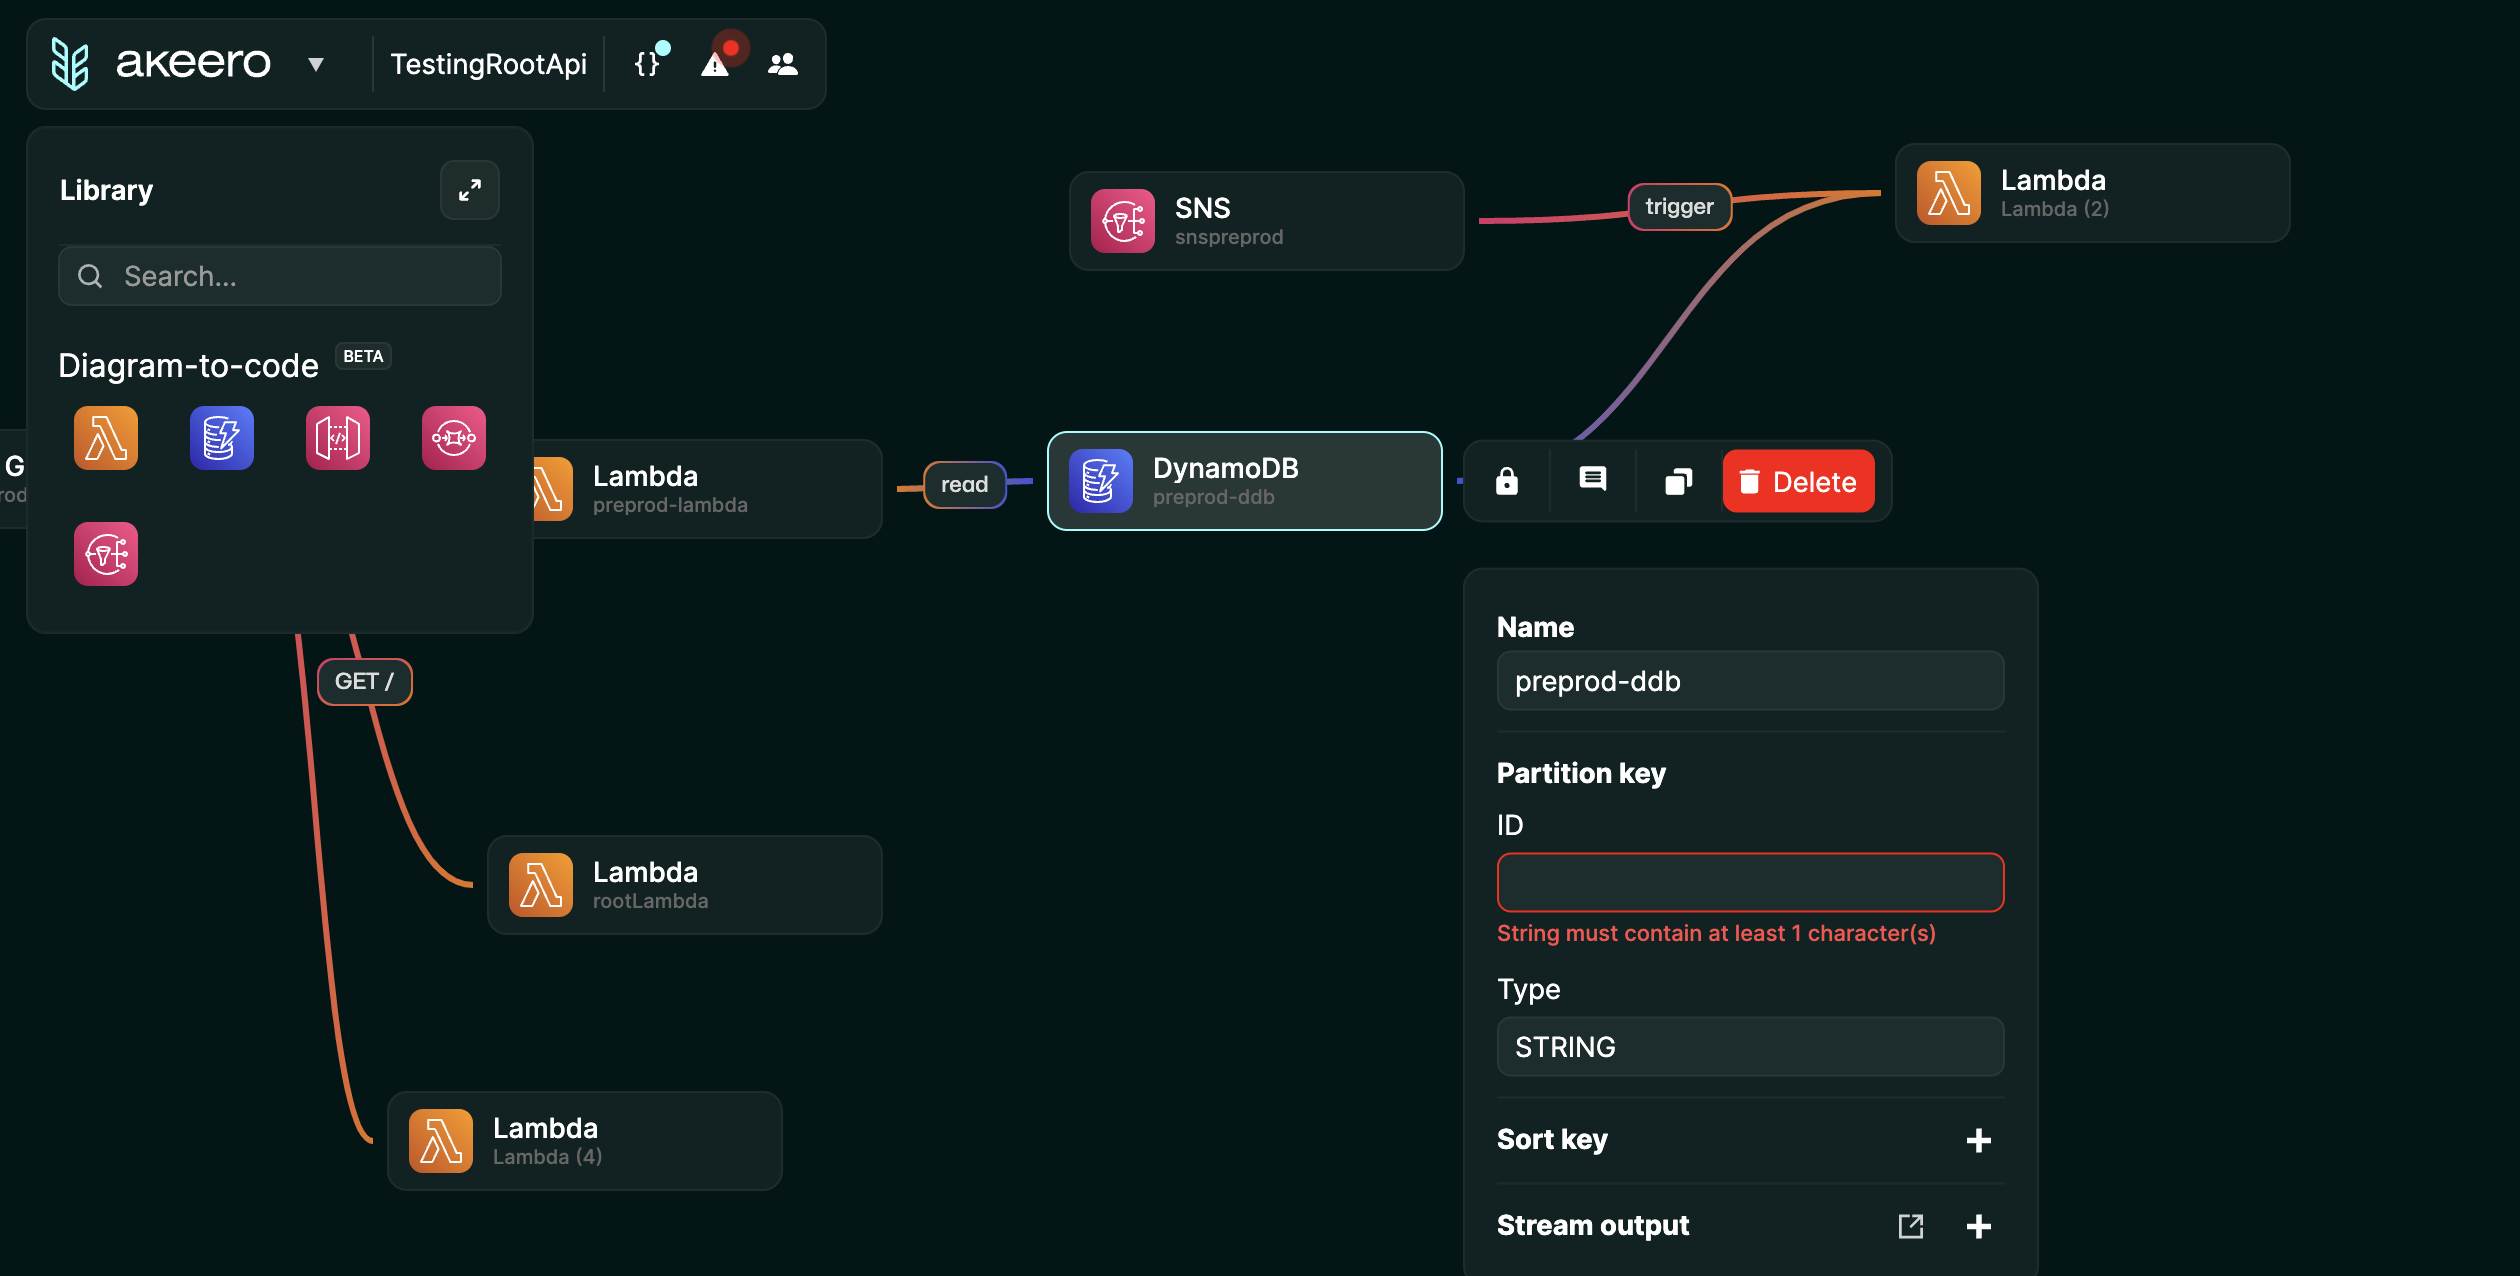
The simplest way of understanding how Akeero works is by starting with the template 'Simple CRUD API'. This contains an API Gateway, numerous Lambdas and a DynamoDB table.
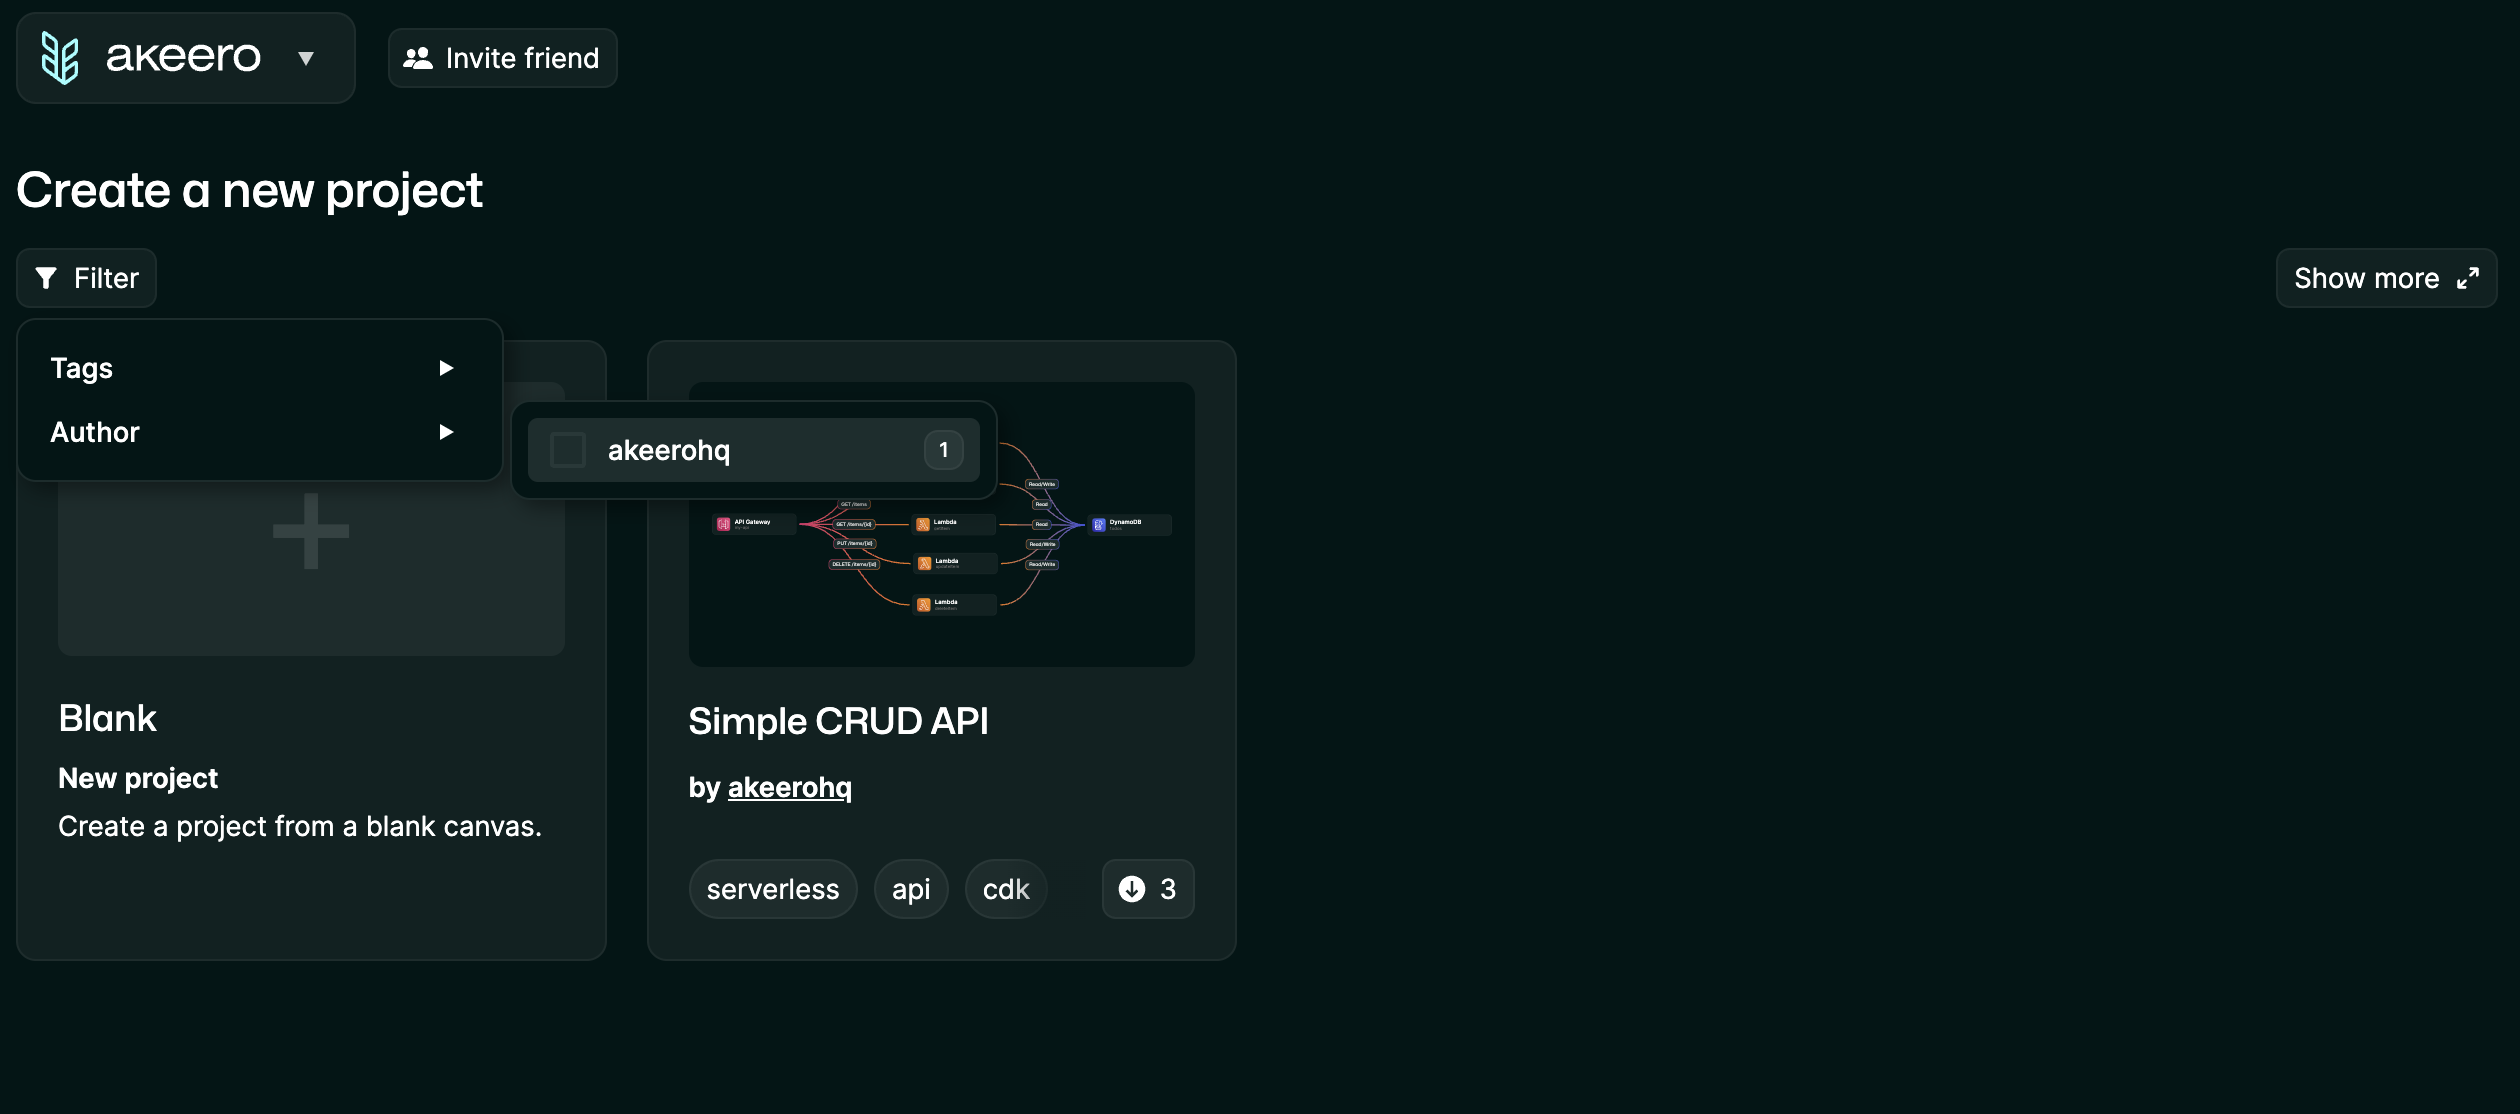
- To get started with this template, from the Dashboard click on 'Filter' in the 'Create a new project' section at the top.
- From there, select 'akeerohq' as the author. You should then see the template 'Simple CRUD API'.
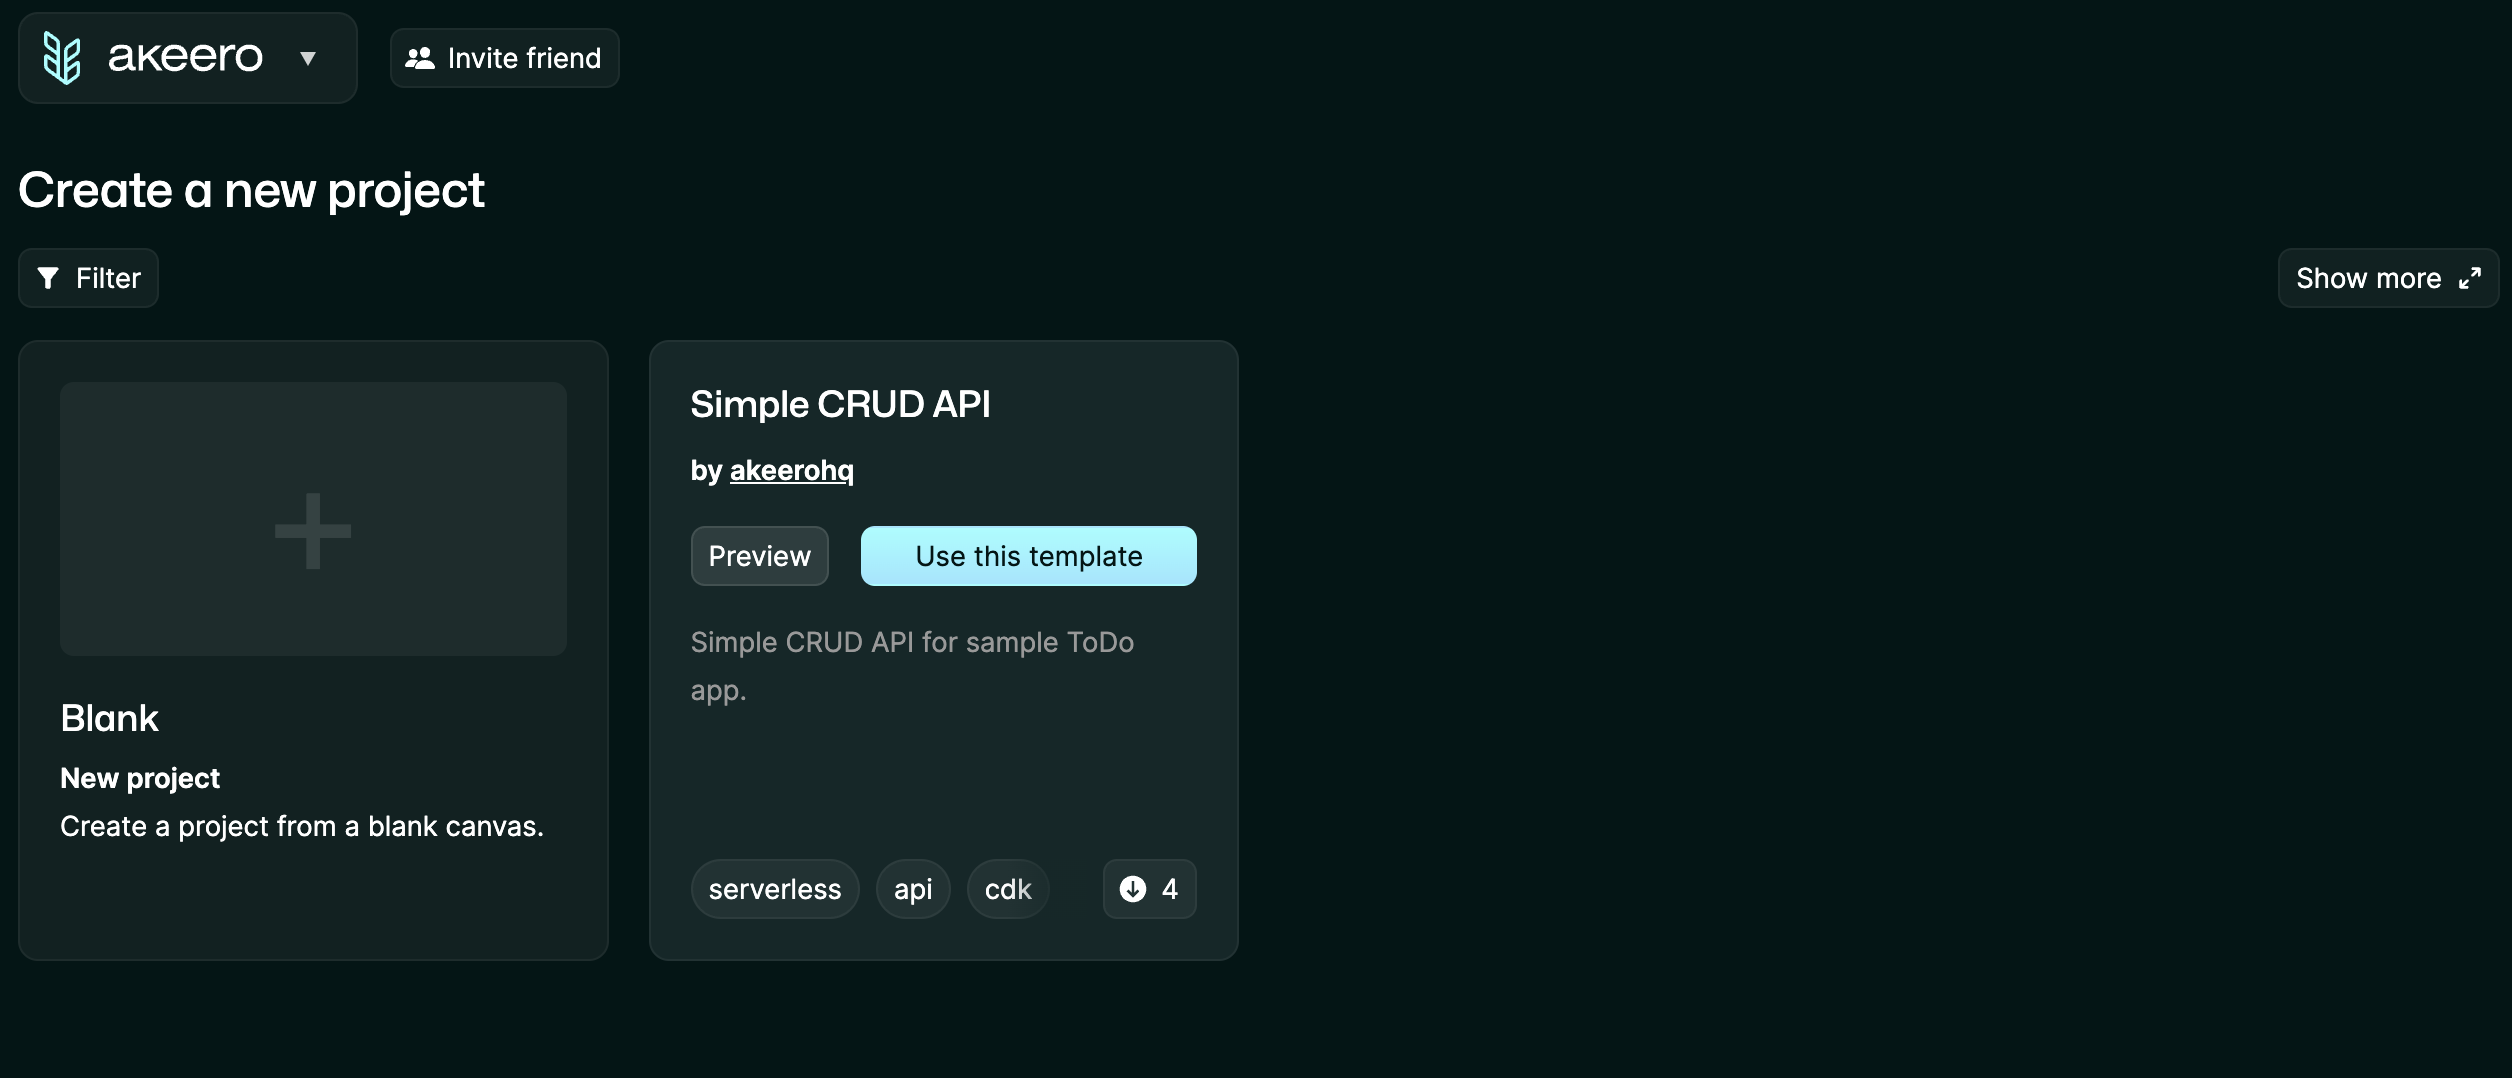
- Click on 'Preview' and a modal will pop up showing a preview of the template.
- Click on 'Use Template' in the top right hand corner.
- This will clone the template into a new project and open automatically on the diagram screen.
- You can drag and drop additional components from the Library as needed.
- If you are using Diagram to Code you will need to provide details for each component and its connections. Please see Diagram to Code for more details.
Blank Project
- To get started with a blank drawing canvas, simply select 'Blank - New Project' and you will automatically be brought to a new project.
- Simply select or search for any component from the Library.
- Drag and drop your component to the canvas.
- Connect your components.
- If you are using Diagram to Code you will need to provide details for each component and its connections. Please see Diagram to Code for more details.
Renaming your project
It's good practice to name your projects within Akeero so that you can easily find them again. The name you provide will also be used as the stack name when using Diagram to Code.
- Each new project defaults to 'Untitled Project'.
- You can change the project name by clicking on the name in the top left and entering the new name and hitting enter.

Saving your project
Akeero auto-saves everything on your behalf, so you wont see a 'Save' button anywhere in Akeero.
Diagram to Code
As you have been building your architecture, Akeero has been creating deployable CDK Typescript that matches your architecture. In order to use this CDK code, there are a few steps to complete.
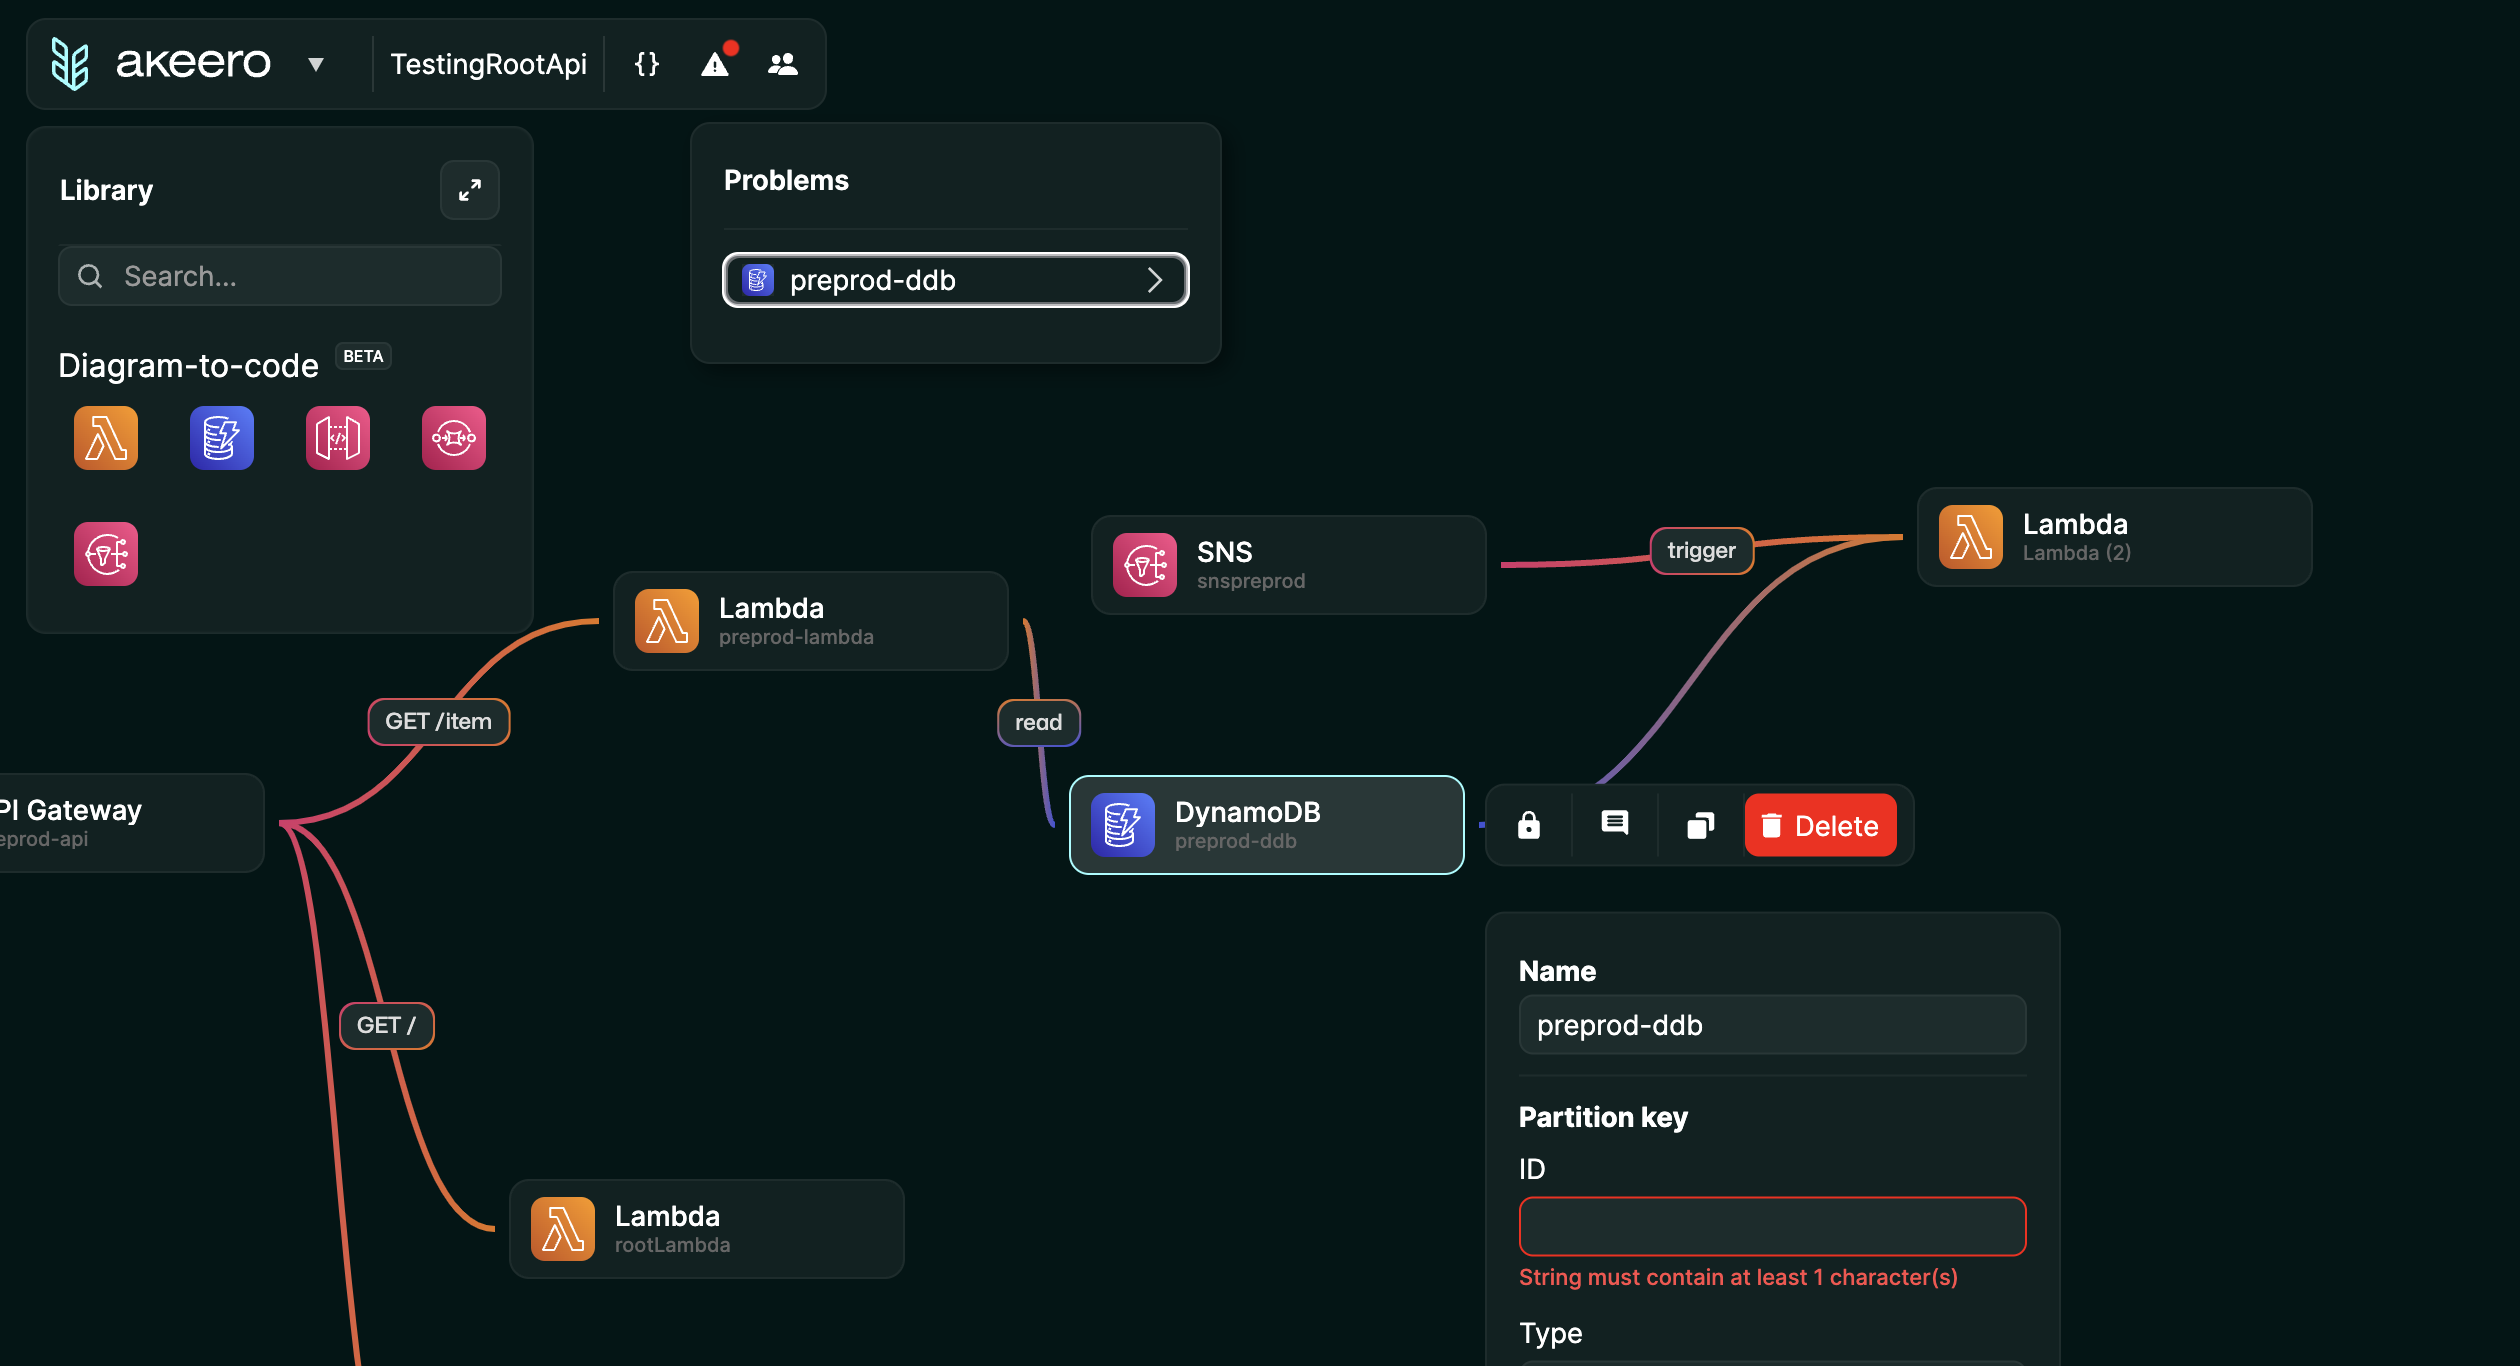
Component & Connection Properties
-
Each component has a set of properties that are required, in order for you to deploy that component to your AWS account.
-
Similarly, each connection can have properties that are required for deployment, e.g. a connection between API Gateway and Lambda.

-
Clicking on a component or connection will highlight the required fields.
-
The code will not be deployable until all required fields have been completed. Akeero highlights this when you open the code panel.
-
Once all the required properties are present, the code can be saved to your local file system.
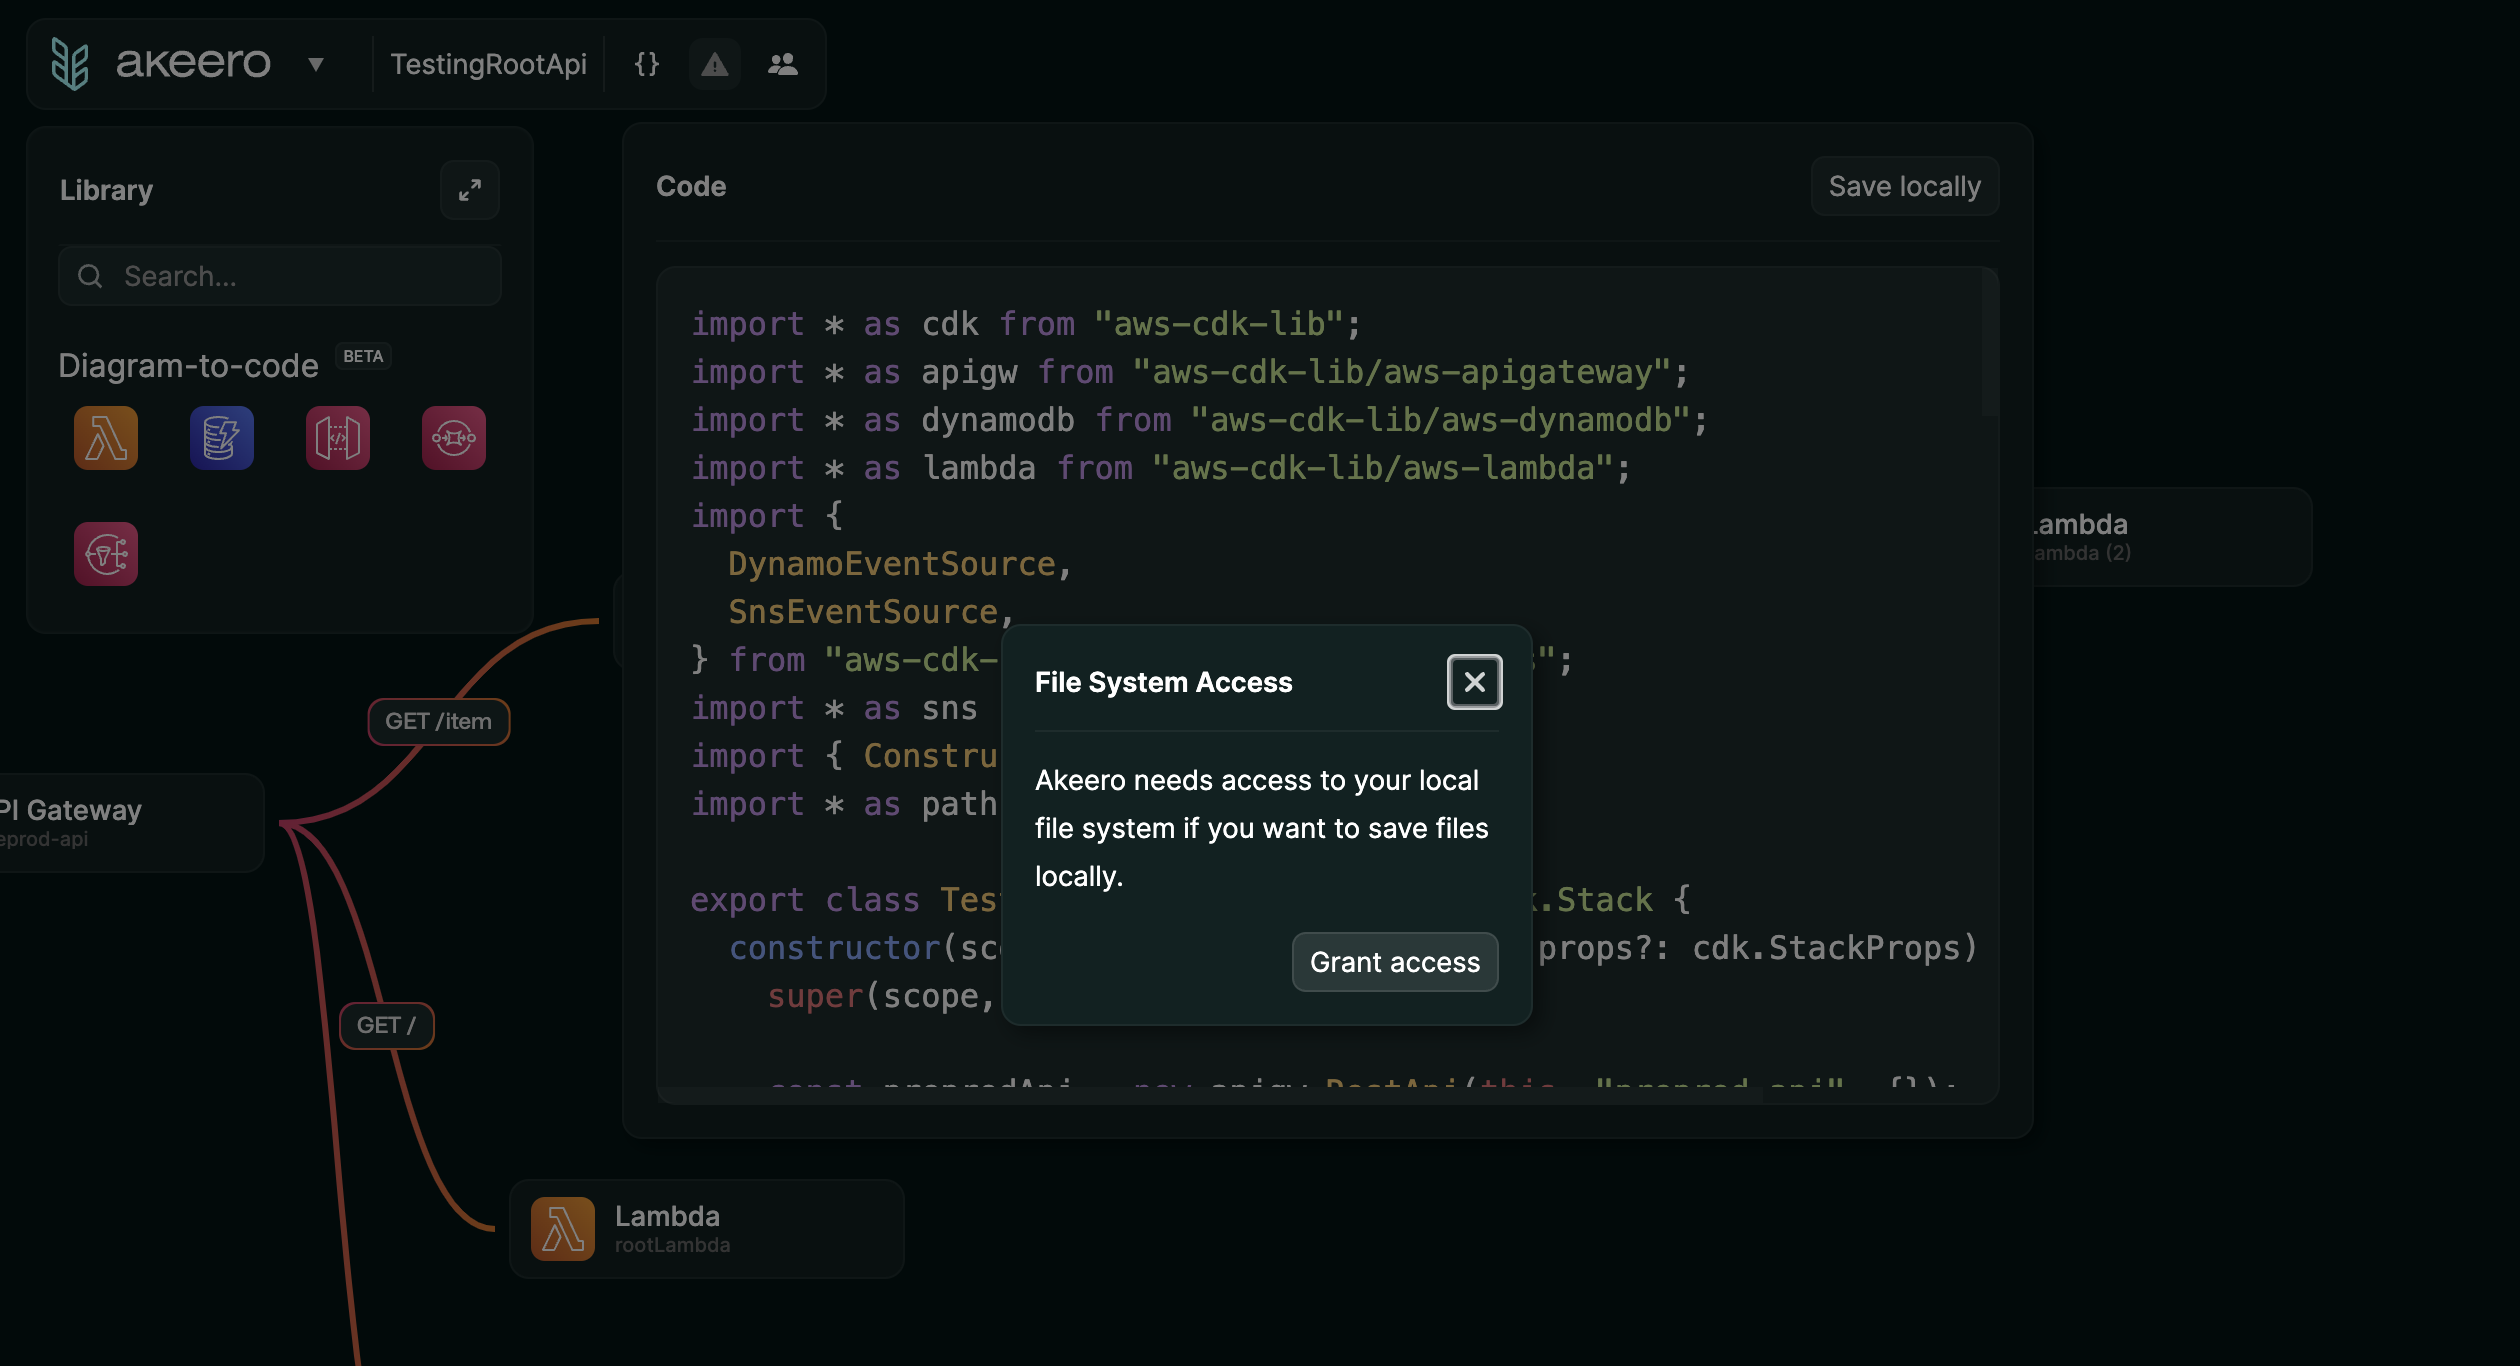
Local File Sync
- In order to deploy your code, Akeero can write the CDK it has generated to your local file system.
- Select 'Save Locally' and you will be prompted to grant access to your file system.
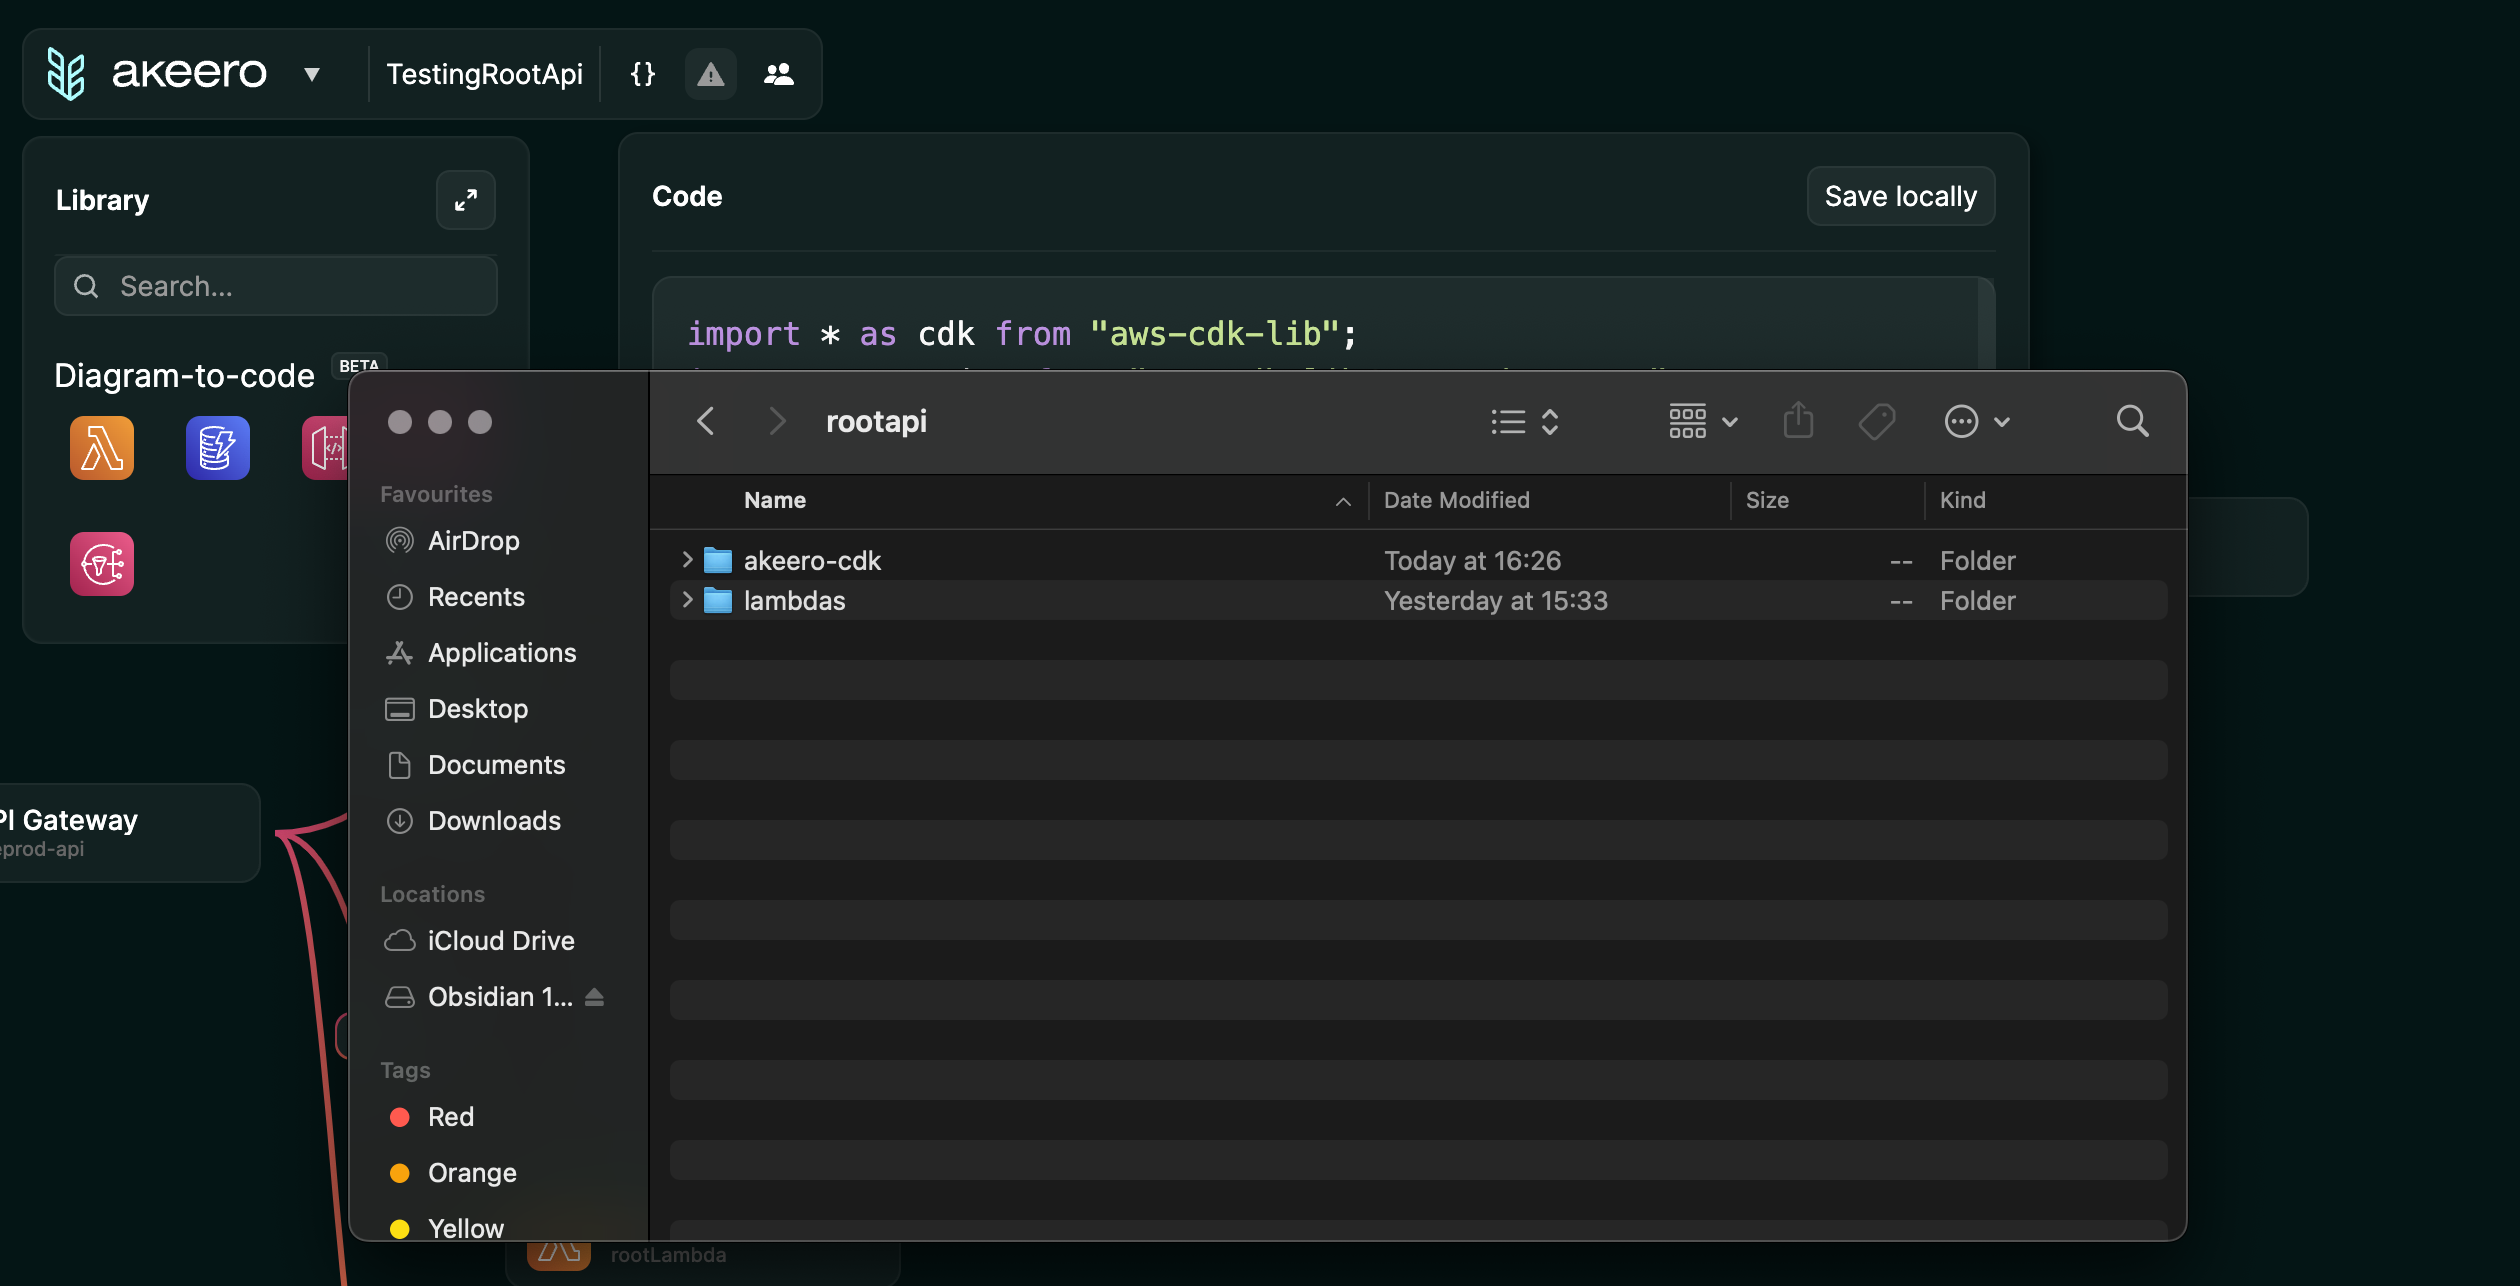
- Select the root of your project directory. This is where Akeero will place its akeero-cdk file. ![Select Folder]/assets/select-folder.png)
- The akeero-cdk file is now saved to your project directory.
Deploying
- From here its pretty simple to deploy your CDK to your AWS account.
- Open a terminal or a terminal in your code editor and navigate to your projectfolder/akeero-cdk
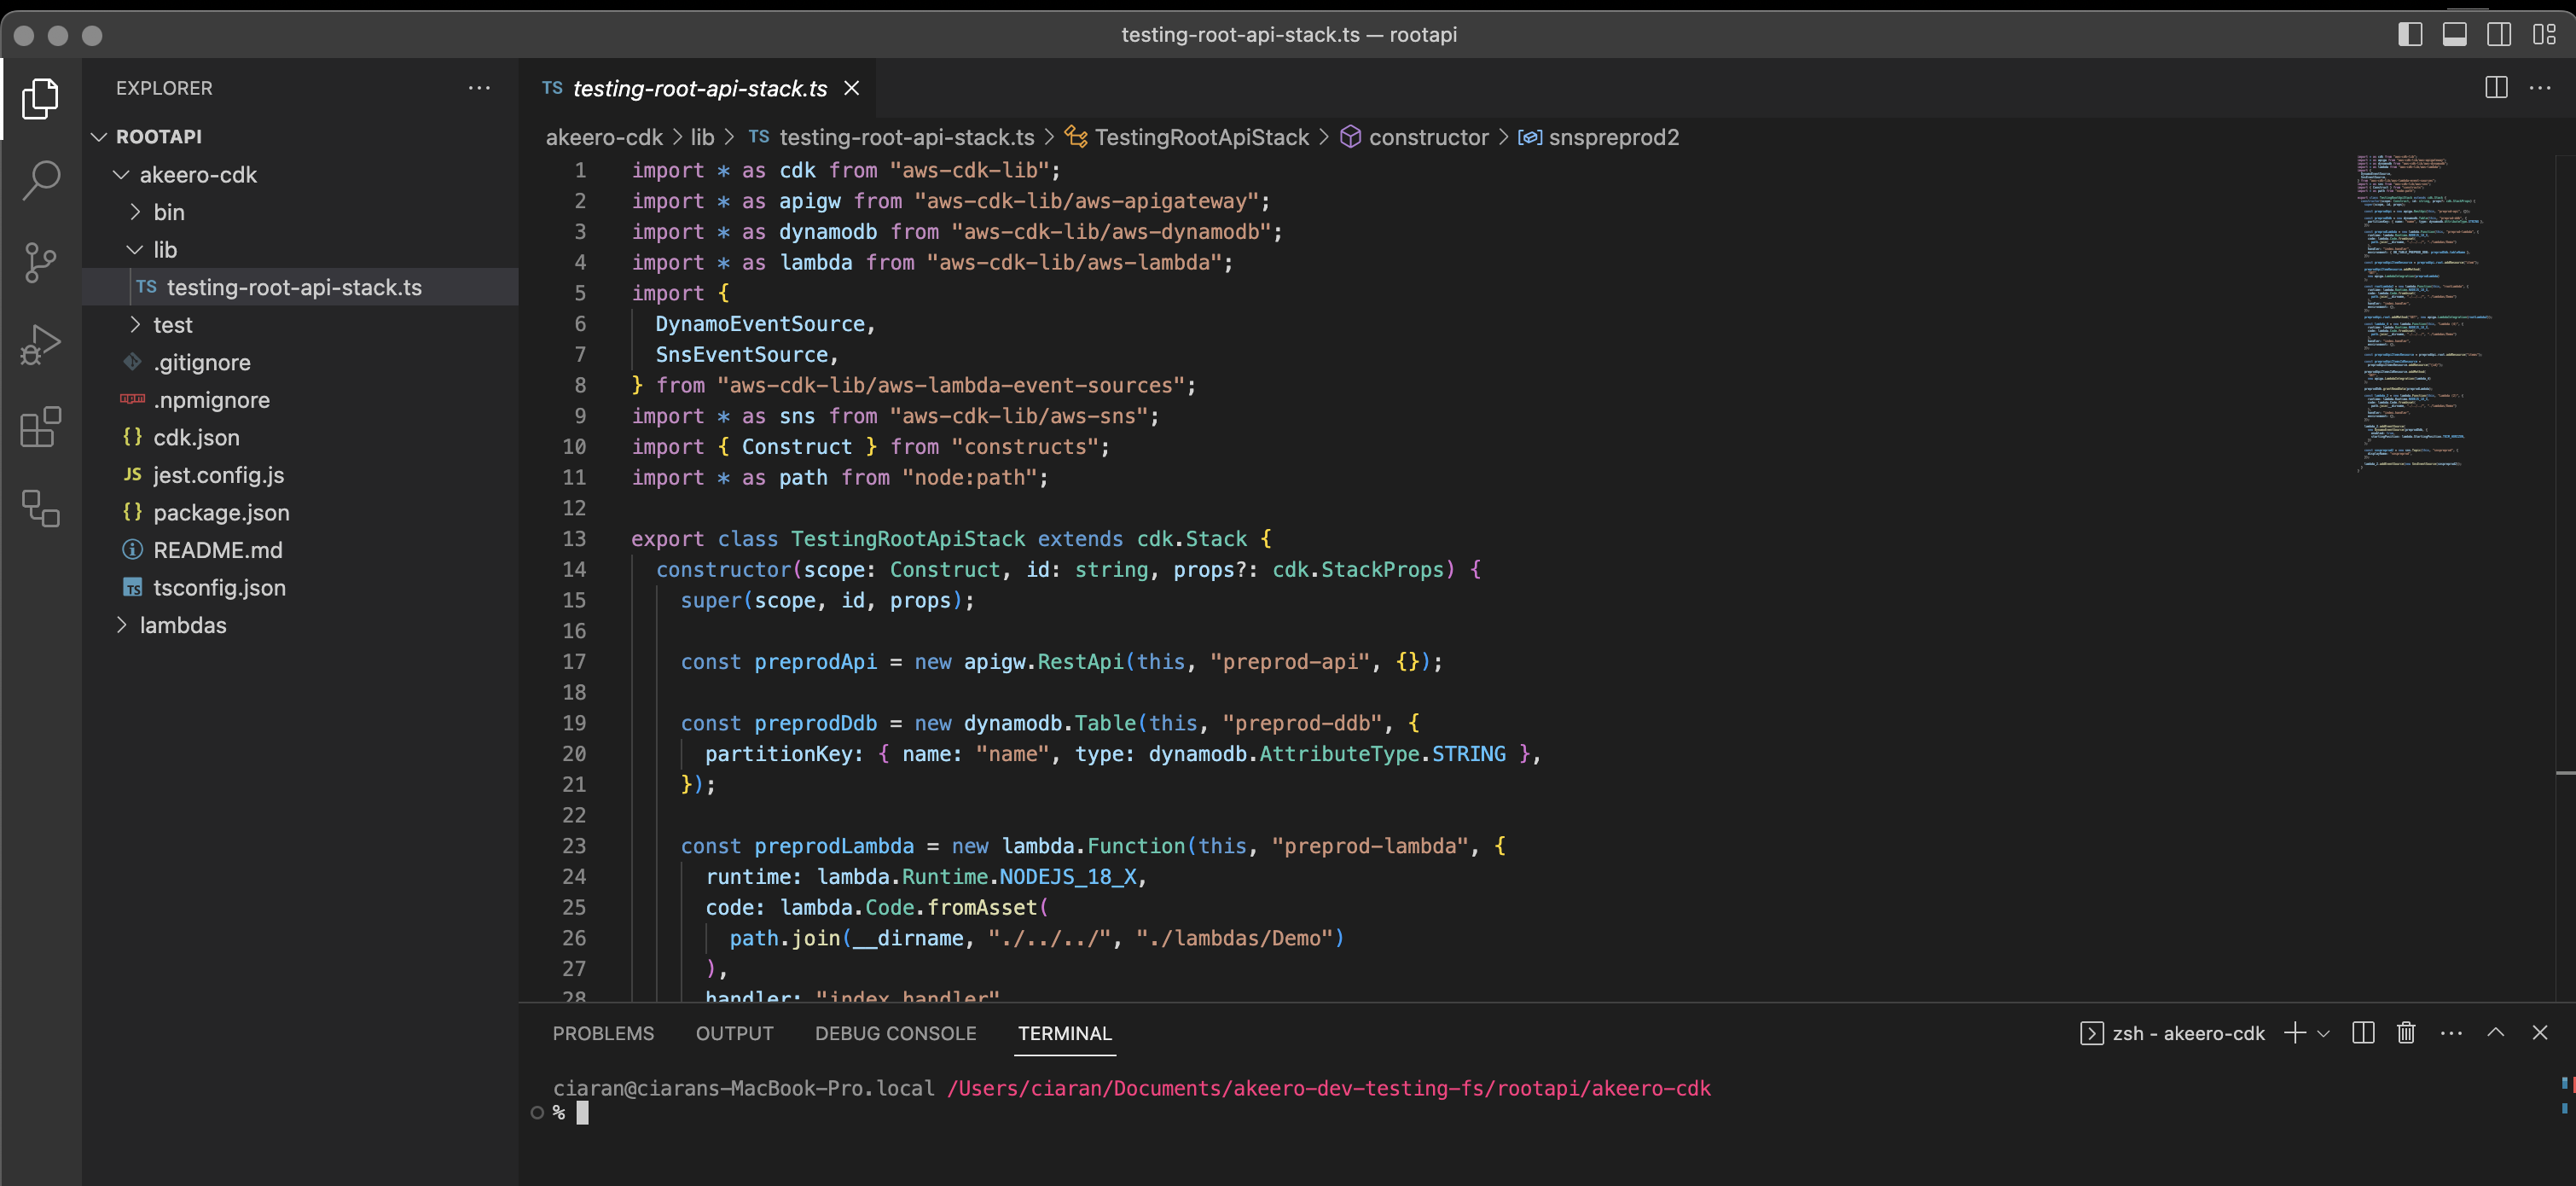
- Run the following commands:
npm install- to install the CDK stack dependencies. These can be seen in the package.json file in the akeero-cdk folder.cdk synth- to synthesise the CDK and ensure it is free from synthax errors, etc.cdk deploy- this will deploy to your AWS account and may incur charges on your account.
Follow the onscreen prompts for the cdk deploy step. Deployment time will
depend on the number of resources in your project.
What's next?
Great, you just deployed your first piece of infrastructure from Akeero. Here are a few links that might be handy as you venture further into Akeero: